Beginner Embroidery Machines NZ: 4 Sewing and Embroidery Machines Compared

Direct Sewing beginner embroidery guide
Choose the right combination machine, build a sensible starter kit and complete your first machine-embroidery project with confidence.
A practical New Zealand guide for home sewists comparing four sewing and embroidery machines, the supplies you genuinely need and the extras that can wait.
Machine embroidery looks magical because the machine moves the hoop and forms the design automatically. The reality is even better: once you understand stabiliser, thread, needles and hooping, it becomes a repeatable creative process rather than guesswork.
The first buying decision is usually the hardest. Do you invest immediately in a dedicated embroidery machine, or choose a combination machine that can sew ordinary seams and also embroider? For many home users who want to test the waters, a sewing and embroidery combination machine is the practical entry point. You can make garments, quilts, bags and repairs as usual, then attach or activate the embroidery system when you want to add names, motifs, labels, monograms and decorative details.
This guide compares four capable home combination machines from Brother, Janome, Singer and PFAFF. It then explains every essential item needed to begin, how to choose stabiliser, what happens during a first project and which upgrades are worth postponing.
Jump to:
Before you buy | Machine comparison | Brother M370 | Janome MC1000 | Singer SE9185 | PFAFF 640 | Starter kit | Stabiliser | First project | Troubleshooting | FAQs
Before choosing a beginner embroidery machine
Do not choose only by the number of built-in designs. Most beginners quickly discover that maximum embroidery area, screen experience and design transfer affect everyday use more than a long feature list.
1. Maximum embroidery area
The stated embroidery area is the largest design field the machine can stitch in one hooping. A 100 x 100 mm machine cannot simply sew a 140 x 140 mm design because the artwork appears close enough. The file must fit the supported hoop and the machine limits.
A 100 x 100 mm field is excellent for names, quilt labels, small chest motifs, children's designs and learning. A larger field provides room for wider lettering, design combinations, bag panels and more ambitious motifs. Larger capacity costs more, but it can reduce the chance that you outgrow the machine.
2. Built-in designs versus imported designs
Every machine in this comparison includes designs and lettering, so you do not need digitising software for your first projects. Importing compatible designs later gives you a much wider creative library. Check whether the machine uses USB, Wi-Fi services or both, and remember that downloaded artwork must be a compatible embroidery file - not an ordinary JPG, PNG or PDF.
3. Screen and editing experience
A larger colour screen makes it easier to view a design, combine lettering, check colours and understand placement. A smaller display can still produce excellent embroidery, but more preparation may happen on a computer or through simpler machine controls.
4. The sewing machine underneath
A combination machine will spend much of its life sewing. Compare feeding, workspace, included feet, buttonholes, quilting controls and automatic functions as seriously as the embroidery specification. The best purchase is the machine you will enjoy using in both modes.
5. Space, storage and setup
Embroidery needs clear space around the hoop because it moves in every direction. A detachable embroidery unit needs storage when not in use. The Janome MC1000 takes a different approach with a rear arm that folds into the machine. Measure your table and allow extra room behind and to the side of the machine before buying.
The question that prevents buyer regret: what is the largest project you realistically want to embroider during the next two years? Buy for that hoop requirement, not only for the first 50 mm monogram you plan to make.
Four beginner sewing and embroidery machines compared
All four machines sew ordinary construction stitches and perform single-needle machine embroidery. Each includes its main embroidery system and at least one hoop. Prices, bundles and availability can change, so use the live product pages for the current offer.
| Machine | Maximum embroidery area | Built-in embroidery | Built-in sewing | Design transfer | Best fit | Consider before buying |
|---|---|---|---|---|---|---|
| Brother Innov-is M370 |
100 x 100 mm 4 x 4 in |
135 designs and 11 embroidery fonts | 181 stitch types | Wireless LAN/Artspira and USB | Learning, monograms, quilt labels and smaller motifs | The 100 mm square field is the smallest in this comparison |
| Janome Memory Craft 1000 |
140 x 140 mm Approx. 5.5 x 5.5 in |
241 designs and 11 English embroidery fonts | 300 stitches | USB flash drive | Compact storage, square designs and broad built-in creativity | The rear swing-out embroidery arm is built into the machine |
| Singer SE9185 |
170 x 100 mm Approx. 6.7 x 4 in |
150 designs and 10 embroidery fonts | 250+ stitches | mySewnet Wi-Fi services and USB | A large colour screen and connected workflow | Some connected content or software services may require an account or subscription |
| PFAFF creative ambition 640 |
240 x 150 mm Approx. 9.4 x 5.9 in |
101 designs and 2 embroidery fonts | 150 stitches | USB embroidery connection | The largest hoop field here and strong garment/quilting fabric control | No built-in Wi-Fi; USB is used for compatible imported designs |
Specifications above are based on the current Direct Sewing product information. Confirm the exact regional package, included accessories and stock status on the live product page before purchasing.
See the four machines
Select any machine image to open its current product page in a new tab.

Straightforward 100 mm starting point
Brother Innov-is M370
100 x 100 mm field | 135 embroidery designs | 11 embroidery fonts | 181 stitch types | 3.7-inch colour LCD touchscreen | wireless LAN and USB
The M370 is the clearest choice for someone focused on names, small motifs, quilt labels and learning core embroidery technique. Its supplied 4 x 4 inch frame is a widely used beginner format, and the package includes the embroidery unit, embroidery foot, frame and several pre-wound bobbins. Compatible designs can be transferred wirelessly from Brother Artspira/Design Database Transfer workflows or imported by USB.
Choose it when: you want an approachable first combination machine and know that most planned designs will fit a 100 mm square.

Compact integrated embroidery arm
Janome Memory Craft 1000
140 x 140 mm field | 241 designs | 300 sewing stitches | 3.5-inch colour touchscreen | USB
The MC1000 offers a useful square step up from 100 mm and an embroidery arm that swings out from behind the machine instead of living in a separate module. It includes the SQ14e hoop, embroidery foot, special embroidery bobbin holder and embroidery scissors.
Choose it when: compact storage, a 140 mm square field and a broad built-in design library are priorities.

Large screen and connected workflow
Singer SE9185
170 x 100 mm field | 150 designs | 10 embroidery fonts | 7-inch colour touchscreen | Wi-Fi and USB
The SE9185 is appealing when visual editing and connectivity matter. The wide touchscreen provides a clear view of layouts and colour stages, while compatible mySewnet services and USB support additional design transfer. The 170 mm width provides more lettering and layout room than a 100 mm square hoop.
Choose it when: you value a large screen, Wi-Fi workflow and a wider embroidery field.

Largest embroidery field in this shortlist
PFAFF creative ambition 640
240 x 150 mm field | 101 designs | 150 sewing stitches | Original IDT System | USB
The creative ambition 640 provides the most embroidery room of these four and a premium sewing platform with PFAFF integrated dual feeding. It suits people who expect to make garments, quilts and bags as seriously as they embroider and want more room before a future machine upgrade becomes necessary.
Choose it when: hoop capacity and everyday sewing performance matter more than built-in Wi-Fi.
Which beginner embroidery machine should you choose?
Choose the Brother M370 if you want to learn on a familiar 100 x 100 mm format and mainly plan small personalisation projects.
Choose the Janome MC1000 if you want a compact built-in embroidery arm and a useful 140 x 140 mm square field.
Choose the Singer SE9185 if a large colour screen, connected design transfer and 170 mm width suit how you like to work.
Choose the PFAFF creative ambition 640 if you want the largest embroidery area in this group and strong dual-feed sewing capability.
The complete home machine-embroidery starter kit
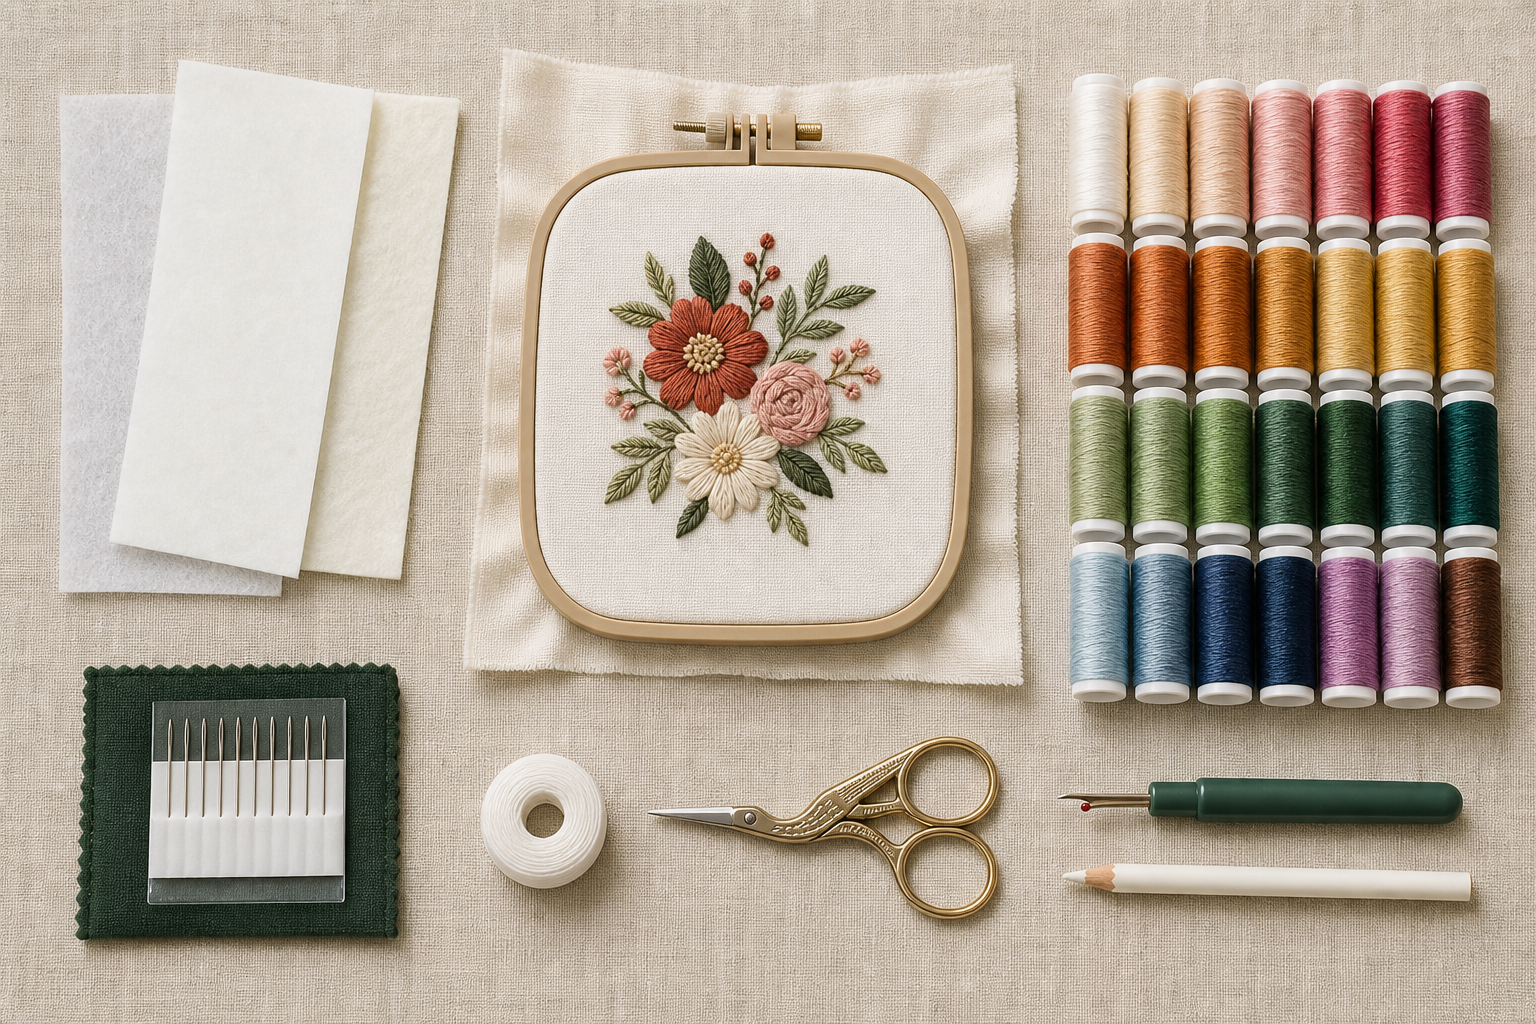
Your machine already includes a hoop, embroidery foot and core accessories. Do not buy duplicates before opening the box. The items below are the consumables and small tools that make a first project possible.
| Item | Why you need it | Beginner starting point | Essential now? |
|---|---|---|---|
| Embroidery stabiliser | Supports fabric so dense stitching does not distort or pucker it. | Madeira or Sulky sample pack | Yes |
| Top embroidery thread | Forms the visible coloured design. | 40-weight polyester starter pack | Yes |
| Embroidery bobbin thread | Creates a fine, tidy underside without adding unnecessary bulk. | Fine 100% polyester bobbin thread wound onto the machine's correct bobbin | Yes |
| Embroidery needles | The wider eye and groove help protect fast-moving embroidery thread. | Domestic 130/705 H-E embroidery needles, commonly 75/11 for standard 40-weight thread | Yes |
| Fine embroidery scissors | Trim colour-change tails, jump threads and stabiliser accurately. | Fine pointed or double-curved scissors | Yes, unless included |
| Practice fabric | Lets you learn without risking a finished garment. | Firm woven cotton, calico or a simple tote bag | Yes |
| Temporary adhesive, marking tools, extra hoops and software | Solve particular placement or design problems later. | Buy only when a project requires them | Not yet |
Stabiliser: the supply beginners underestimate most
Embroidery places hundreds or thousands of stitches into a relatively small area. Fabric alone often cannot resist that pulling force. Stabiliser supports the fabric during stitching and, depending on the type, may continue supporting the design after washing and wear.
A starter assortment is especially valuable because you can feel, hoop and stitch different types before committing to a full roll. Both options below include learning material and multiple stabiliser categories.

Twelve stabiliser samples
Madeira Stabilizer Starter Pack
Includes tear-away, cut-away and wash-away options plus a stabiliser instruction booklet. This is an efficient way to discover what works before buying full rolls.

Fifteen-piece sample kit
Sulky Stabiliser Starter Kit
Provides tear-away, cut-away, wash-away and speciality samples with an instructional brochure. It suits beginners who want to compare removal methods hands-on.
Which stabiliser should you use?
| Type | Use it for | What happens afterwards | Beginner example |
|---|---|---|---|
| Tear-away | Stable woven fabrics and lighter designs | Excess support tears away around the finished design | Calico sample, quilt label or firm tote |
| Cut-away | Knits, stretch fabrics, clothing and dense designs | Support remains permanently behind the embroidery | T-shirt or sweatshirt motif |
| Wash-away backing | Projects where no backing should remain, including suitable lace techniques | Dissolves in water according to product instructions | Freestanding lace design made for wash-away support |
| Wash-away topping | Towels, fleece and fabrics with pile or texture | The top film is removed and remaining traces dissolve | Name on a towel |
| Self-adhesive stabiliser | Items that cannot be hooped normally, such as suitable pockets, cuffs or small pieces | The project is floated on adhesive support; removal depends on the product | Hard-to-hoop finished item after basic technique is mastered |
Beginner rule: do not start with a stretchy T-shirt. Begin with a stable woven cotton and tear-away stabiliser, then move to cut-away-backed knits after you can hoop and thread the machine consistently.
Browse the complete embroidery stabiliser collection
Top thread and bobbin thread do different jobs
The bright thread visible on the front is top embroidery thread. The fine thread underneath is bobbin thread. They are intentionally different. Standard 40-weight machine-embroidery thread provides colour and sheen, while finer bobbin thread helps keep the back tidy and avoids unnecessary bulk in dense designs.

Gutermann Creativ Bobbin Thread
500 m | 100% polyester | fine, smooth and tear-resistant
Wind it onto the correct bobbins for your machine unless your manual specifies another setup.

Madeira Polyneon Starter Pack
18 x 400 m | No. 40 polyester embroidery thread
A practical first colour library with generous spool length, smooth running and the durability suited to garments, gifts and home projects.

Madeira Rayon 40 Colour Set
18 x 200 m | No. 40 viscose rayon
Choose rayon when brilliant shine and a soft embroidered finish are central to the project. Check current availability on the product page.
Polyester or rayon for a beginner?
Polyester is the most practical first set for frequently washed clothing, children's items, bags and everyday experimentation. Rayon offers a particularly glossy, soft finish for decorative work. Both can stitch beautifully when matched with the correct needle, stabiliser and tension.
Embroidery needles and scissors
A fresh embroidery needle is cheap insurance. Standard embroidery thread moves rapidly through the needle eye, so an embroidery-specific needle uses an enlarged eye and wider groove to reduce friction. A common starting choice for 40-weight embroidery thread is size 75/11, but the fabric, thread and machine manual take priority.

Schmetz Embroidery Machine Needles
Domestic 130/705 H-E needles with a light ball point, enlarged eye and embroidery-thread groove. Replace a bent, burred or damaged needle immediately.

Madeira Curved Embroidery Scissors
The double curve reaches over the hoop while the fine tips trim close to thread without forcing the blades against the fabric.
What you do not need on day one
- Digitising software: begin with built-in designs and compatible professionally digitised files. Turning artwork into stitch data is a separate skill.
- Every hoop size: use the supplied hoop first. Optional hoops must be specifically compatible with the machine and cannot increase its maximum embroidery field.
- Large commercial rolls of stabiliser: learn from a sample pack, then buy full rolls of the types you actually use.
- Dozens of single thread colours: an 18-colour starter pack is enough for learning and reveals which shades you need in larger quantities.
- A cap frame: ordinary domestic combination machines do not become commercial cap machines simply by adding an online frame. Work only with compatible accessories and supported techniques.
- Paid design subscriptions: use built-in designs until you understand file formats, hoop sizes and design quality.
Your first embroidery project: step by step
Choose an easy first project
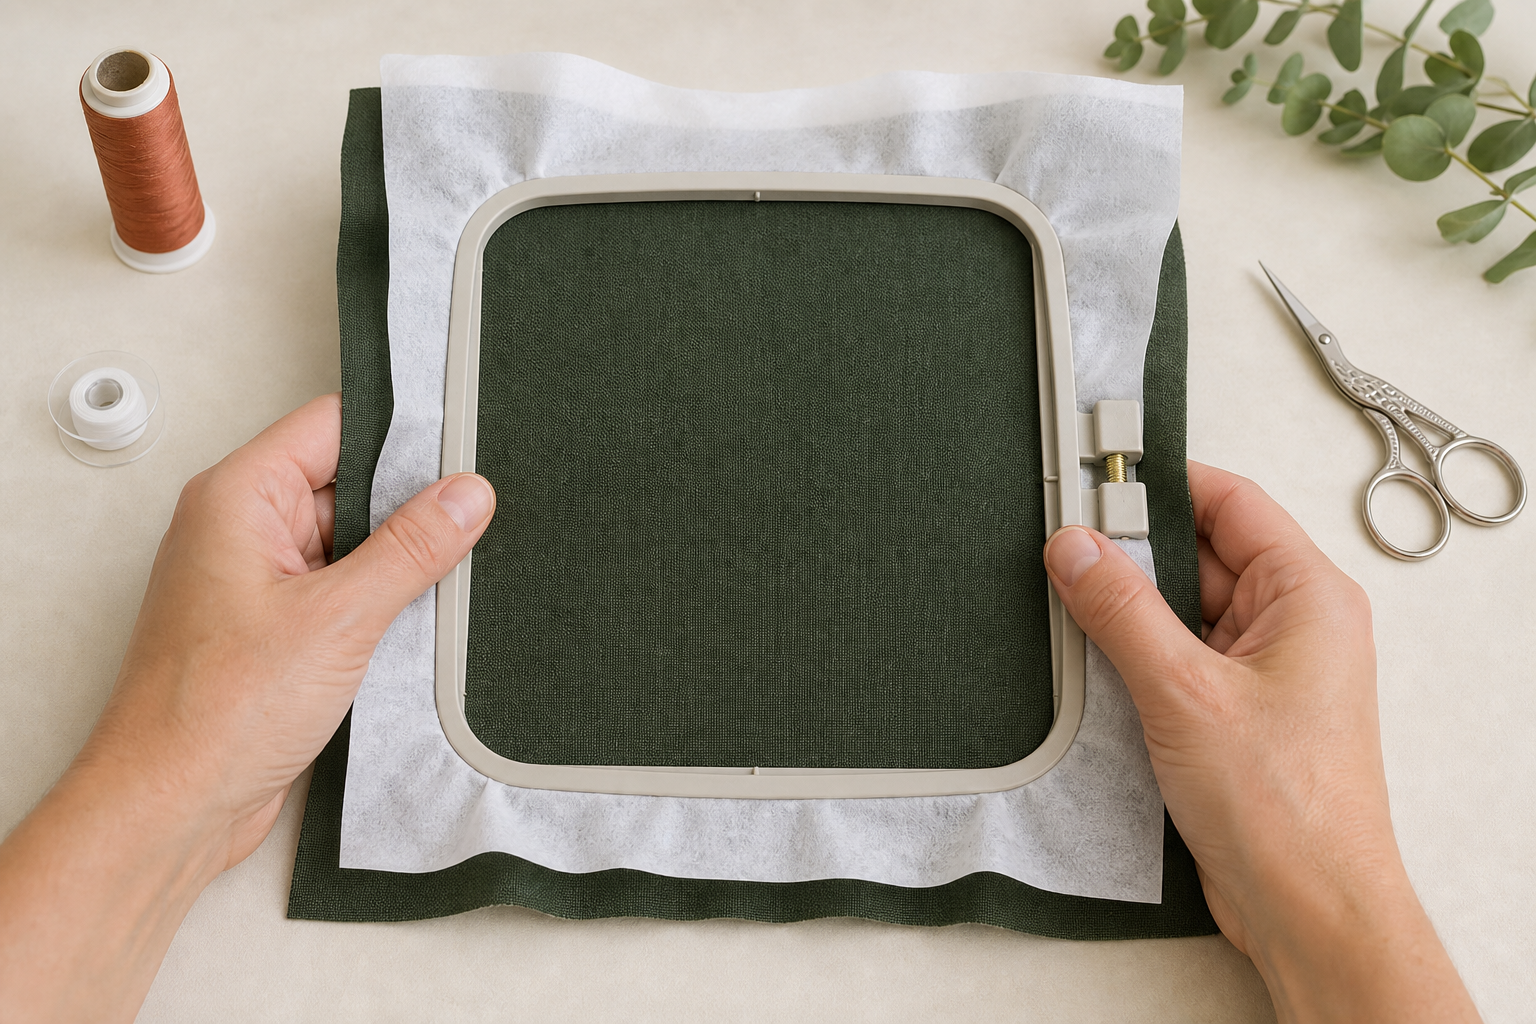
Use a firm woven cotton or calico, medium tear-away stabiliser, one or two thread colours and a small built-in design. Avoid towels, stretchy garments, hats, finished pockets and very dense artwork until the basic workflow feels familiar.
- Read the setup section of the manual. Install the embroidery unit or deploy the built-in arm, attach the embroidery foot and confirm the correct bobbin/bobbin holder arrangement.
- Insert a fresh embroidery needle. Make sure it is fully seated and facing the direction specified by the machine manual.
- Prepare the bobbin. Wind the machine's correct bobbin evenly with embroidery bobbin thread, or use only a manufacturer-approved pre-wound option.
- Select a small built-in design. Confirm that the displayed design fits the supplied hoop and review its colour sequence.
- Cut stabiliser larger than the hoop. It must be caught securely on every side rather than sitting only under the design area.
- Hoop the fabric and stabiliser together. Smooth them without stretching. The surface should be firm and flat, but extreme hoop tension can distort fabric.
- Attach the hoop correctly. Clear the machine bed and embroidery-arm path. Never place objects where the moving hoop may hit them.
- Thread with the presser foot raised. Raising the foot opens the tension discs so the thread seats properly. Use the correct spool cap and follow every thread guide.
- Check position. Use the machine's outline, trace or basting function where available to confirm that the design sits inside the intended area.
- Lower the foot and begin slowly. Stay with the machine. Stop if you hear knocking, see fabric loosening or notice a thread nest.
- Change colours when prompted. Trim tails carefully and keep hands away from the needle and moving hoop.
- Remove and finish. Take the hoop off the machine before releasing the fabric. Remove stabiliser according to its instructions, trim threads and press from the reverse using a suitable pressing cloth.
Never leave an embroidery machine running unattended. A thread snag, broken needle, loose hoop or object blocking the embroidery arm can turn a small issue into damaged fabric or equipment.
Beginner embroidery troubleshooting
| Problem | Likely causes | First checks |
|---|---|---|
| Puckering around the design | Insufficient or wrong stabiliser, stretched fabric, design too dense, hooping issue | Re-test on a fresh sample with suitable stabiliser and relaxed fabric |
| Thread nest underneath | Top thread missed tension discs, machine threaded with foot down, incorrect bobbin insertion | Remove the nest safely, raise the foot and rethread completely |
| Top thread keeps breaking | Damaged needle, poor threading, incorrect spool cap, thread snag or excessive speed | Replace the needle, rethread and check the spool path |
| Bobbin thread showing on top | Incorrect threading, bobbin orientation, bobbin thread or tension setup | Return to the manual's embroidery threading setup before adjusting tension |
| Stitches sink into a towel | Pile is swallowing the design | Use suitable backing underneath and water-soluble topping above |
| Design no longer lines up | Fabric loosened, hoop was bumped or the arm was obstructed | Stop immediately; do not force the hoop or continue over a displaced design |
| Downloaded design will not open | Wrong file format, design exceeds hoop/machine limits, unsuitable USB formatting or corrupted file | Confirm machine format, dimensions and transfer instructions |
A sensible beginner buying pathway
Step 1
Choose the machine
Decide by hoop size, screen, transfer method and sewing capability.
Step 2
Add consumables
Stabiliser sampler, top thread, bobbin thread and embroidery needles.
Step 3
Add one cutting tool
Use included scissors or choose fine curved embroidery scissors.
Step 4
Learn before expanding
Finish three simple projects before buying software, hoops or speciality supplies.
Start your home embroidery setup
Choose your machine first, then add supplies that match the projects you will actually make. Direct Sewing can help you compare hoop capacity, stabilisers, thread, needles and compatible accessories before you commit.
Beginner machine embroidery questions
Should a beginner buy a sewing and embroidery combination machine?
A combination machine is a practical choice when you need ordinary sewing and want to explore embroidery without owning two machines. A dedicated embroidery machine may suit someone who already owns a good sewing machine or expects to run both tasks at once.
Is a 100 x 100 mm embroidery hoop big enough?
It is large enough for many names, small motifs, quilt labels and 4 x 4 inch design files. It is not large enough for every jacket back, large bag panel or wide lettering layout. Decide from your planned projects.
Do I need embroidery software immediately?
No. Use built-in designs and lettering first. You can also purchase professionally digitised files in a compatible format. Software becomes relevant when you want deeper editing or to create stitch files from original artwork.
Can an embroidery machine sew a JPG or PNG image?
No. A picture file contains pixels, while an embroidery file contains stitch type, direction, sequence and colour information. Artwork must be digitised into a format supported by the machine.
Do I always need stabiliser?
Machine embroidery almost always requires appropriate stabilisation. The type and amount depend on the fabric, design density, laundering and desired finish. Test the complete fabric-thread-stabiliser combination before stitching the final item.
Can I use ordinary sewing thread for machine embroidery?
Use thread designed for machine embroidery unless the design and machine instructions specify otherwise. Embroidery thread is manufactured for rapid decorative stitching and consistent colour. Thread type changes tension and appearance.
Do I put the same thread in the bobbin?
Usually no. Most ordinary designs use fine embroidery bobbin thread underneath and coloured embroidery thread on top. Follow the machine manual because bobbin weight, bobbin case and tension requirements can vary.
What is the easiest first embroidery project?
A small built-in design on stable woven cotton with tear-away stabiliser is ideal. It removes the complications of stretch, pile, awkward hooping and downloaded-file compatibility.
Can I embroider caps on these machines?
Domestic flat-bed machines have different limitations from commercial cap systems. Do not assume a generic cap frame is compatible. Ask Direct Sewing about the exact machine, cap construction, hoop and supported technique before purchasing accessories.
How often should I change an embroidery needle?
Replace it at the first sign of skipped stitches, thread damage, popping sounds, visible bending or after a demanding project. Starting an important dense design with a fresh needle is sensible.
Final recommendation
For a first home setup, choose the machine by its hoop capacity and everyday workflow, then buy a stabiliser sampler, a 40-weight polyester thread set, dedicated bobbin thread, domestic embroidery needles and fine scissors. Use a built-in design on stable woven fabric before adding difficult garments or purchased files.
The goal is not to own every accessory on day one. It is to create one clean result, understand why it worked and repeat the process. Once that foundation is secure, new hoops, specialist stabilisers, rayon colours, design libraries and software become informed upgrades instead of expensive guesses.
How this guide was prepared
Machine and accessory details were checked against the current Direct Sewing product pages. Practical stabiliser and needle guidance was cross-checked with manufacturer information from Madeira, Sulky, Schmetz and Brother. Product specifications, bundles and availability can change; the live product page and machine manual take priority.